Electronics & Coding
Warring
The content of this section is a copy of a working document that is constantly being updated. To see the latest updates visit here: https://hackmd.io/@vico/S1s43aIhj
Selecting a board
When you have an idea for your project, the first step is to create a functional proof of concept, this will give a lot of feedback and new ideas will come during the process. The best approach to prototype electronics is go with an already built prototyping electronics board.
The ESP32 Feather is the board that we will use normally over the course, there are a lot more options and depending on the project maybe you will need to check other options, that’s why we prepared a guide on how to select a board.
On the next class we will talk about Sensors & Actuators so we can use our board to interface with the real world.
The Arduino project

Arduino is an open-source hardware and software company, project, and user community that designs and manufactures single-board microcontrollers and microcontroller kits for building digital devices. Its hardware products are licensed under a CC BY-SA license, while the software is licensed under the GNU Lesser General Public License (LGPL) or the GNU General Public License (GPL), permitting the manufacture of Arduino boards and software distribution by anyone. Arduino boards are available commercially from the official website or through authorized distributors.
from wikipedia
Freedom to use, understand, modify and share your tools.
The Arduino project has been very important in opening black boxes, the electronic world has changed dramatically since this project became popular, introducing people from completely different fields to the world of electronics and allowing the use of this tools in all kind of creative processes.
Arduino components
Arduino is not just a board, it is composed by tree complementary parts, obviously the hardware, the software, and the community.
Each of this has an important role on growing collective knowledge on electronics. Their approach is always based on openness and the idea of summing efforts, on the hardware side you will see support for all type of boards, independently if there are produced by Arduino group or not, they also release circuit schematics, so anyone can produce and sell boards.
On the software side, creating an accessible IDE, and most importantly cores and libraries that allow easy access to previously difficult and very technical features and functions. Allowing beginners and non technical inclined people to begin prototyping their own ideas.
And the community as producer of a very large amount of knowledge in the form of tutorials, libraries, open sourced projects.

Resources
Arduino The Documentary (2010) How Arduino is open-sourcing imagination | Massimo Banzi The Arduino ecosystem Adafruit Learn Arduino series
Coding languages

Please check the Making things do things documentation, for some guidelines on code design, flow charts and libraries.
C++ (arduino or not)
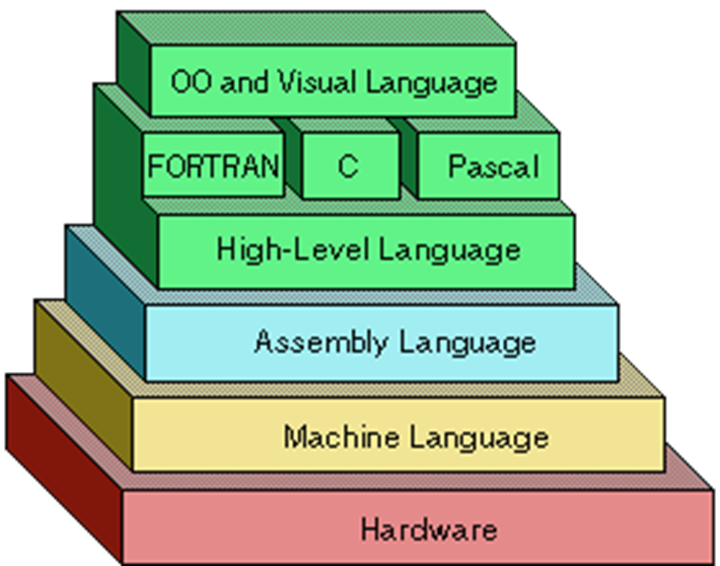
The standard lenguaje to use with arduino, and the most common one in general microcontroller programming is C and C++.
Python
There are many programming languages, for programming microcontrollers C or C++ are the most common ones, nevertheless python support is slowly becoming available for many boards and libraries are starting to pop up. Don’t expect the same level of readiness that you can find on the Arduino environment, but Python is an option that you can consider if C is not your thing.
Keep in mind that you will need a big microcontroller in terms of RAM and flash memory, the ESP32 family can handle it without problems.
Resources
Circuit Python Micropython, and a big list of microcontroller you can use it in, can also be used on SBC’s like the Raspberry Pi.
The internet is your friend
There are a lot of electronics resources for beginners (and almost any level) on the internet, invest time on researching other people ideas and solutions. The Arduino project, among others, has created a very dynamic community around hacking and electronics, you can start just learning from others and suddenly without realizing you will be posting solutions.
There are some magic words that can help your searches, try just adding the Arduino word to your search about some strange sensor and the results will change magically to pages that can be understood by anyone. With the right words, even YouTube can show you something interesting!
Some sites in no particular order:
- hackaday
- learn.adafruit.com
- learn.sparkfun.com
- instructables
- Arduino documentation
- Raspberry Pi documentation
- makezine.com
Debugging
The most normal output after building your prototype is… none! It does not work!! But Why?

Note
Isolating problems it’s a very difficult thing, the best approach is to divide and conquer. Try to solve issues one by one, when many variables are involved, the solution tends to hide!
Continuity, voltage
One of the most common problems is a bad connection, use the multimeter in continuity mode (🔊) to check if every thing is connected. If you are already using the multimeter, the next step is to check if the voltage levels are in fact the ones that you expect.

Print, print, Serial.print()
The Serial port is your best friend, send any information that can be relevant to your problem. After you find the problem, you can just comment the print lines to avoid the extra output.
Please check Arduino Serial reference to check for any details on how to use it.
  // print it out in many formats:
  Serial.println(analogValue);       // print as an ASCII-encoded decimal
  Serial.println(analogValue, DEC);  // print as an ASCII-encoded decimal
  Serial.println(analogValue, HEX);  // print as an ASCII-encoded hexadecimal
  Serial.println(analogValue, OCT);  // print as an ASCII-encoded octal
  Serial.println(analogValue, BIN);  // print as an ASCII-encoded binary
Power or heat
When nothing seems to make sense, when a microcontroller is behaving erratically, normally there are two things that tend to be the ones to blame:
- 🪫Power if electronics are not powered properly, they tend to misbehave and changing results are common, this type of problem is very difficult to debug because when you think you’re understanding the problem, it changes! Try using other power supply, battery or whatever power source you need.
- 🥵 Heat if heat is not being released properly, chips can make strange things, so if your electronics still misbehave after giving them good power, try to check for overheating…
Lets do some music
As an excercise, after this class, the assignment will be to make some music with your board and a simple buzzer, document it with some images, videos, your experiencies, problems and reflections about what you learned.
Research about libraries that you can use, and try different approaches, if you like you can use an input to change your music, but please don’t just build a keyboard, trying to do generative music or something similar will greatly improve your coding skills.
 annotate “Phasellus posuere in sem ut cursus (1)”
References
The tone() function Play a melody Pitch follower using the tone() function Arduino Songs More complex Mozzi library
Previous MDEF clases (electronic or coding related)

